Complete operating guide
The complete guide to running a repair shop with VMOTEK
VMOTEK connects the company, shop, team, customer, vehicle, appointment, estimate, approval, work order, technician, parts, purchasing, invoice, payment and service history. This guide follows that complete operating lifecycle in the order a repair business uses it. Owners should use it for onboarding and controls; advisors, technicians, purchasers, receivers and billing staff should use the sections that match their responsibilities.
Written by the VMOTEK Product Team · Updated August 13, 2026
Set up VMOTEK
Company & Shops
Establish company identity, shop configuration, dispatch rules, service menus and customer-facing workflow standards.
01
Understand the operating record
The customer and vehicle are the durable service relationship. Appointments plan future visits. Estimates describe proposed scope and price. Approval records the customer's decision. The work order controls active repair execution. Purchase records explain unavailable parts. The invoice records the final charge, and payment settles it. Keep these records connected rather than recreating customer, vehicle or service information at each stage.
- Company: the organization operating one or more shops.
- Shop: the physical or operating location serving the job.
- Customer and vehicle: the owners of communication, service and billing history.
- Estimate and approval: proposed work and authorization.
- Work order: active operational record for labor, parts, assignment and status.
- Invoice and payment: financial completion; Delivered records the later vehicle handoff.
02
Configure the company
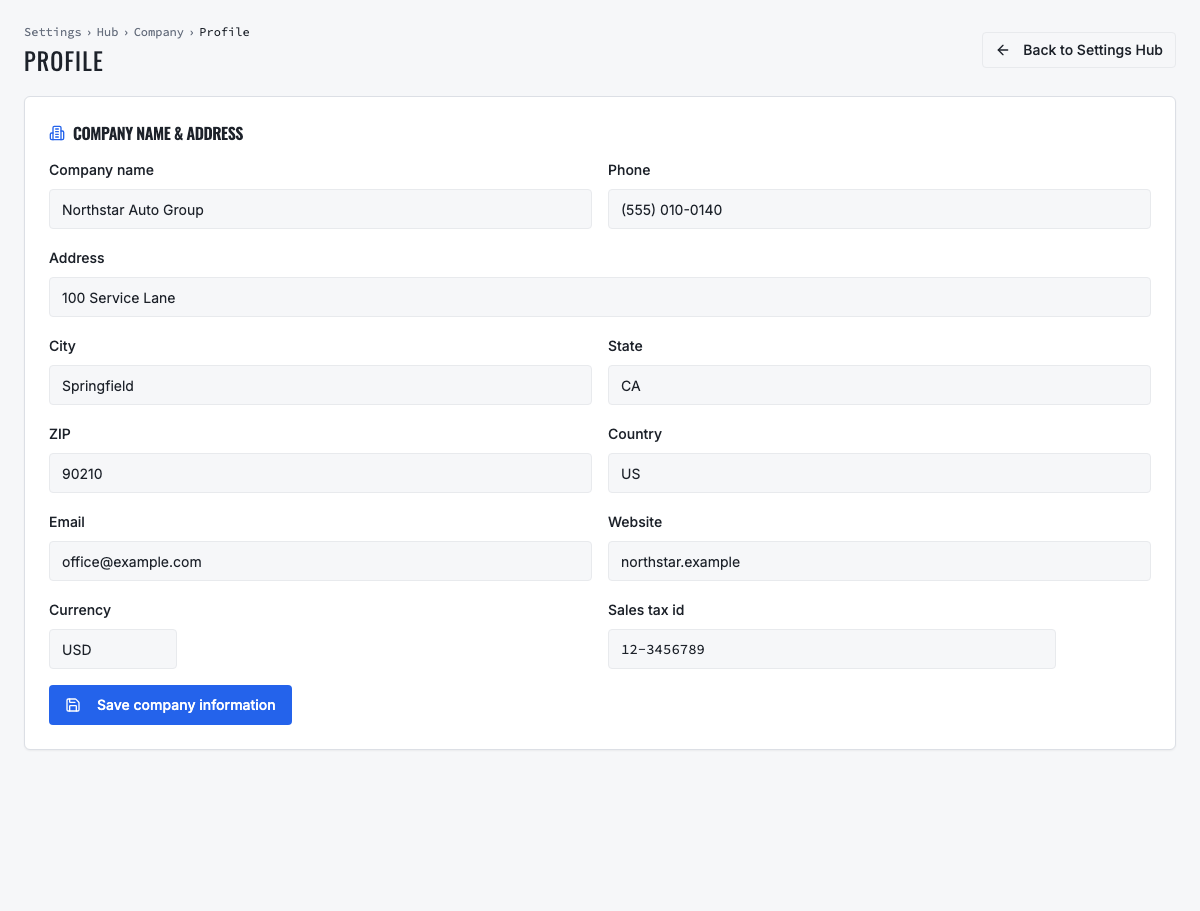
An owner or administrator enters the organization-wide company name, email, address, country and currency. Save, refresh and reopen the profile. The company identity in the profile should agree with the company shown in the application header.
03
Configure each shop
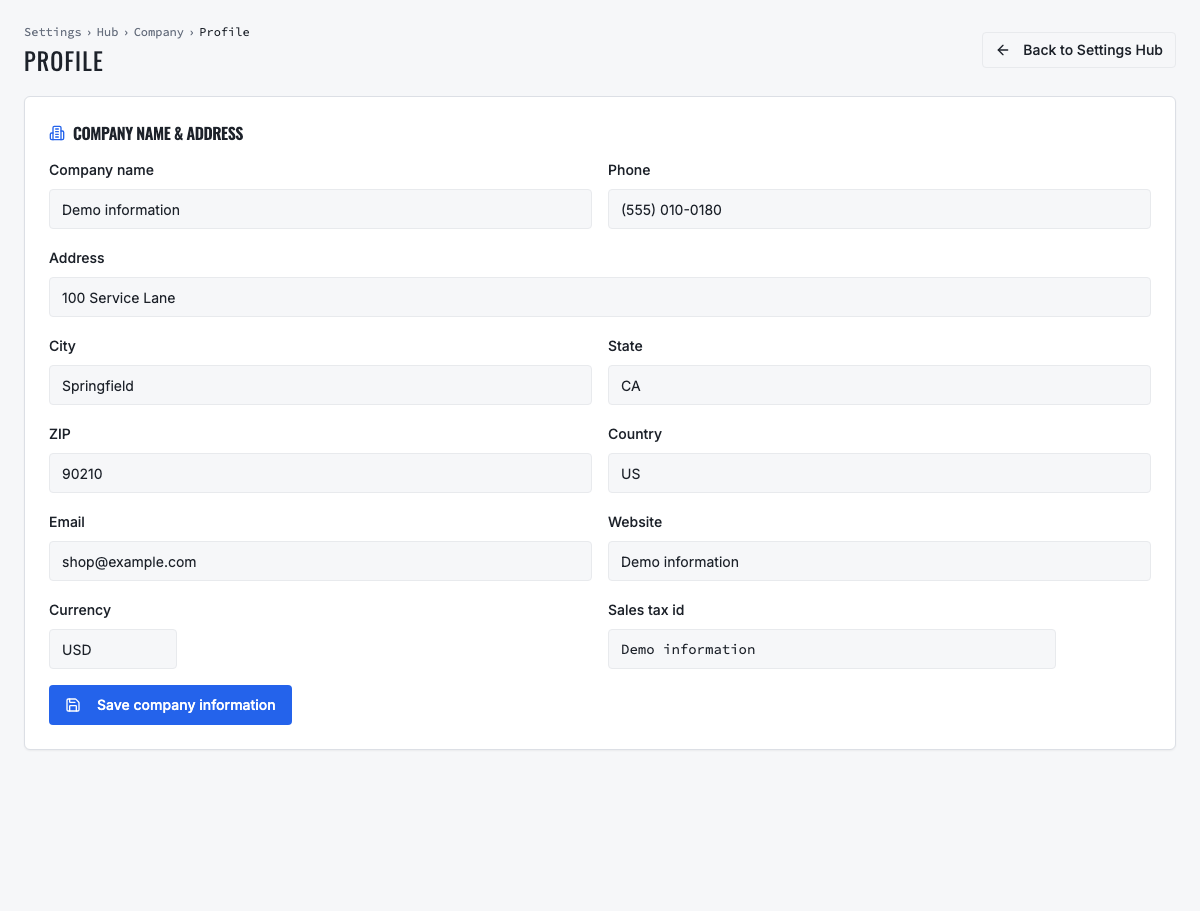
Enter the shop's customer-facing name, phone, email, address, currency and tax settings. In a multi-location organization, repeat this for each shop. Use the company record for organization identity and the shop record for the location that appears on local operations and customer documents.
04
Configure work assignment and readiness
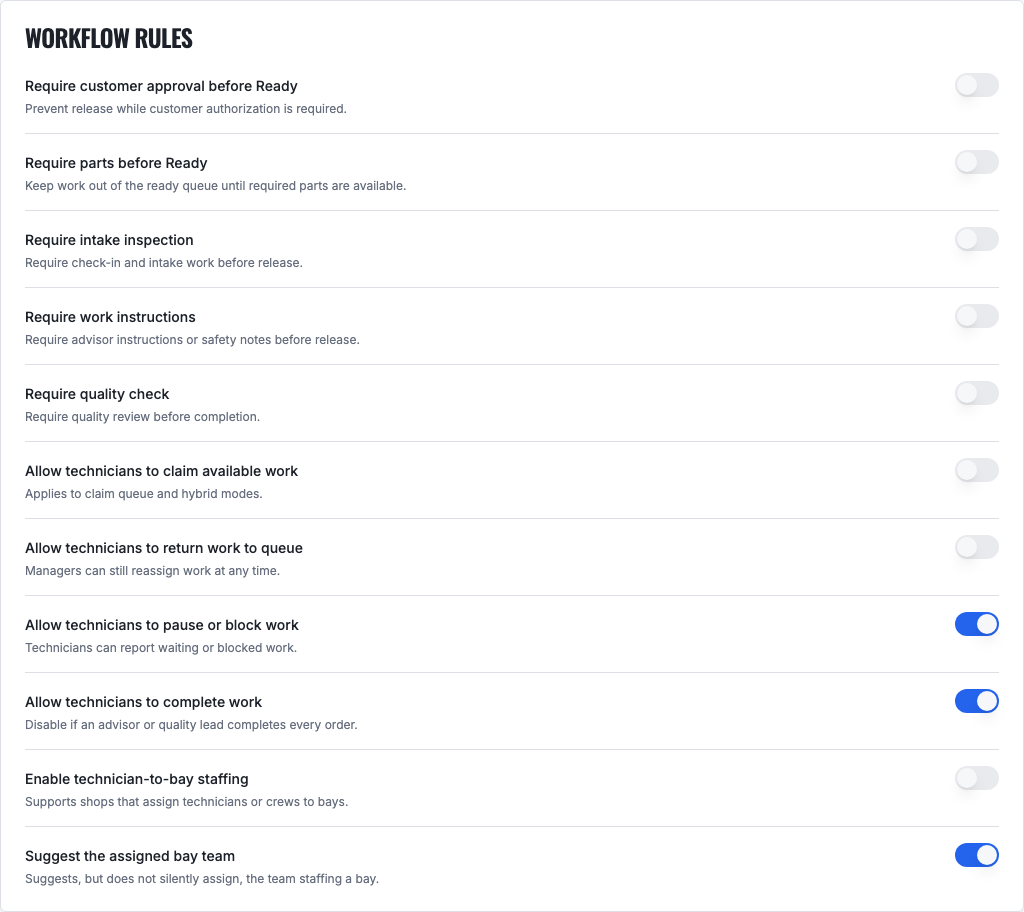
For each shop, choose advisor assignment, technician claiming or a hybrid dispatch model. Configure what must be true before work is Ready, which technician actions are allowed, how bays or crews are used and which notifications require attention. Explain the chosen method to the team.

05
Configure service menus, intake forms and diagnostic templates
Create the reusable operating content staff will apply during intake, estimating and repair. Company-level service menus and templates provide a consistent default; use a shop-specific override only when that location genuinely follows different services, pricing or inspection steps.
- Open Settings → Company → Service Menu to define reusable labor and part packages shown in Add from service menu.
- Open Settings → Company → Intake Template to define check-in and walk-around fields, evidence and condition controls.
- Open Settings → Company → Diagnostics to standardize inspection and diagnostic content.
- For a location-specific exception, open Settings → Shop → choose the location → Service Menu or Intake Template. Leave overrides empty when the company standard should apply.
- Name items in language advisors and technicians understand, include required evidence, and test the result on a sample work order before go-live.
- Review menus and templates whenever services, labor policy, equipment or customer-document requirements change.
Set up VMOTEK
Team & Security
Assign accountable individual access, proper job roles and explicit location boundaries.
01
Add employees, roles and shop access
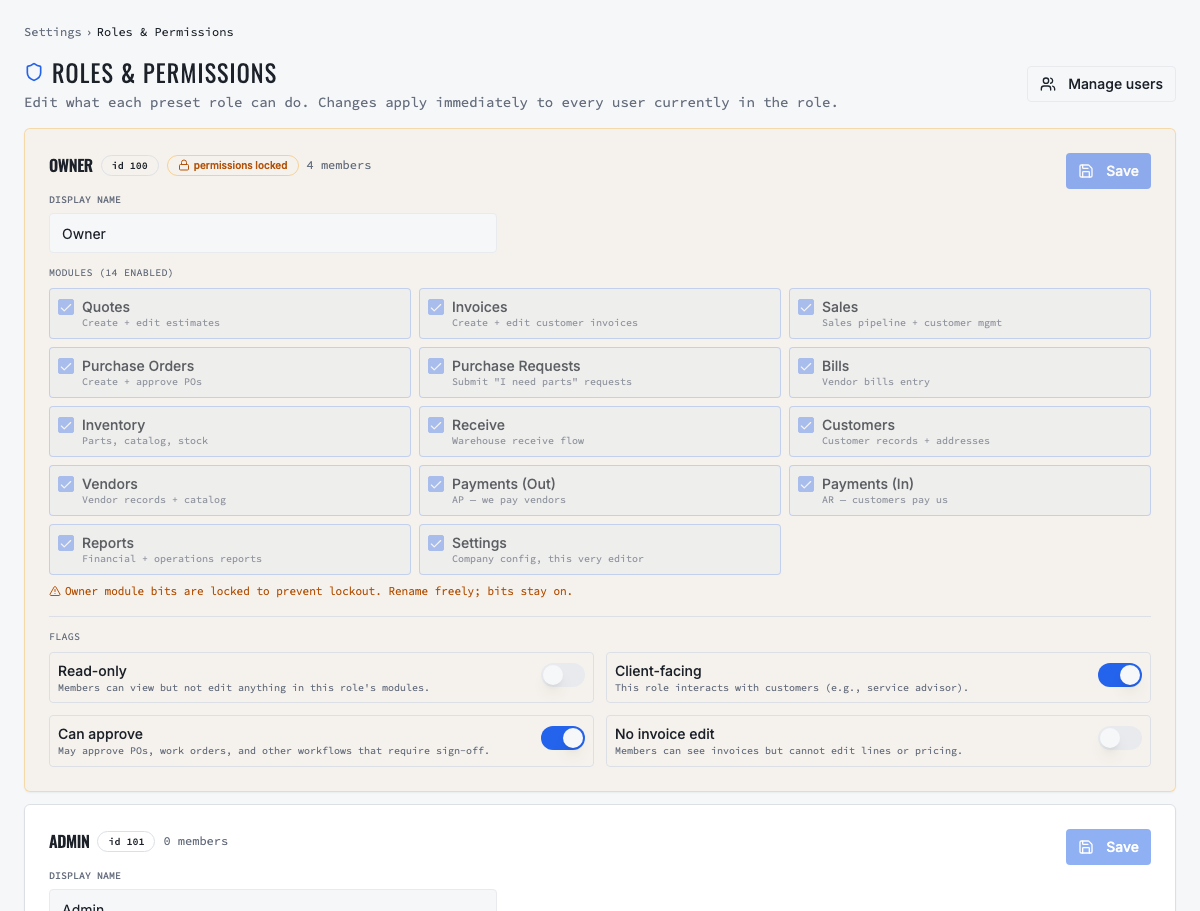
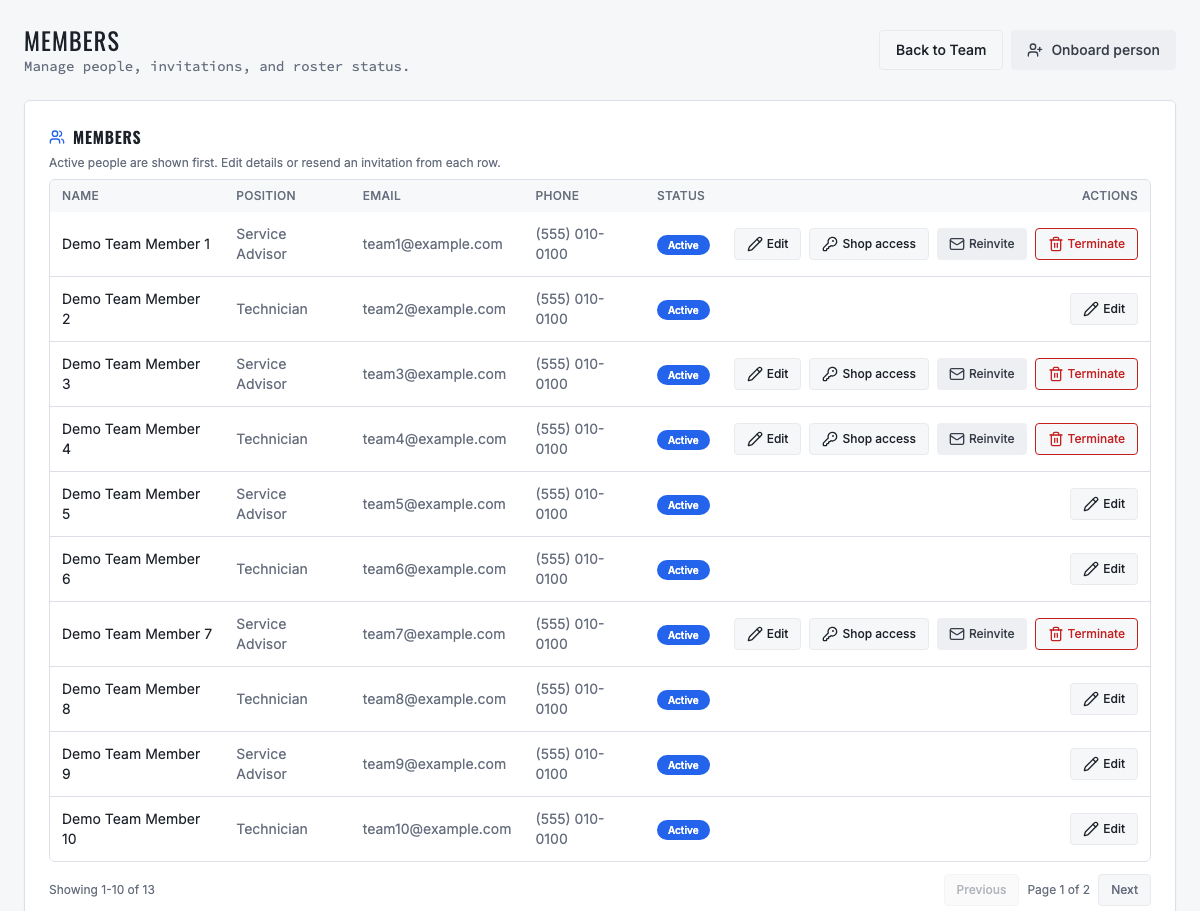
Invite every employee with an individual email, then configure both role and shop access. Open Settings → Company → Roles & Permissions to review the preset roles and their module access. Use Team → Shop access to choose the locations where each employee may operate. Role permission and shop membership are separate controls; a correct role does not grant access to every shop.
- Owner or Admin: full access, including Settings and user administration. Reserve these roles for accountable administrators.
- Shop Manager: all operating modules for assigned shops, including estimates, invoices, purchasing, inventory, receiving, reports, customers, vendors and purchase requests, but no company Settings by default.
- Service Advisor: estimates, invoices and sales, customer records, inventory lookup and purchase requests. This lets an advisor build and price work without authorizing vendor purchase orders or changing company settings.
- Technician: restricted work-order access for eligible assigned or claimable jobs, with pricing and administrative access hidden. Do not add customer, invoice-editing, purchase-order or Settings access merely for convenience.
- Use Purchaser for vendor commitments and purchase orders, Receiver for receiving, and Accountant for invoices, bills, payments and reports when those duties are separated.
- A technician assigned to one shop should appear only in that shop's technician choices. Change the employee's shop access first if the person legitimately moves locations.
- After configuration, sign in as an advisor, technician and manager test user. Verify menus, direct URLs, editable fields, work assignment and shop selector, not just the role name.
Set up VMOTEK
Data Setup
Create or migrate customers, vehicles, vendors and the records needed before live work begins.
01
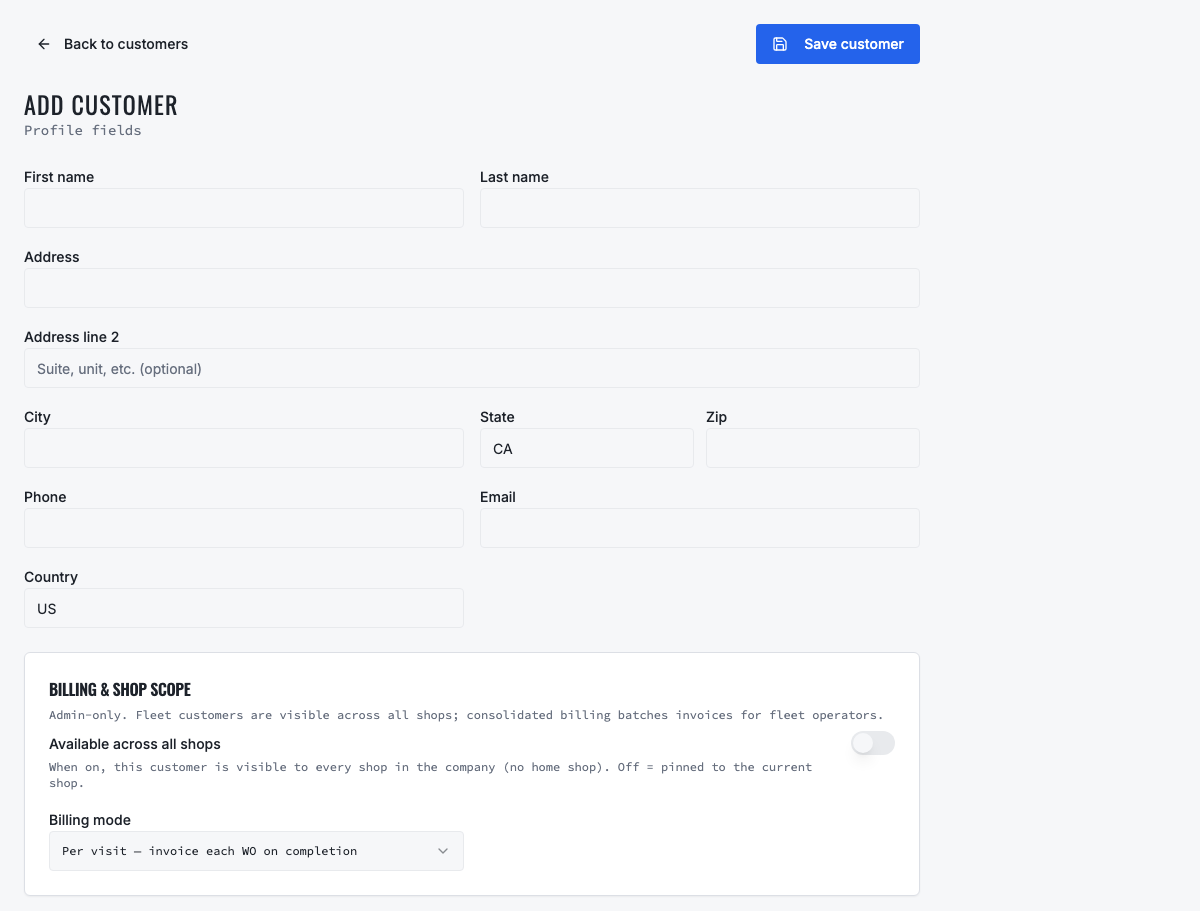
Create or find the customer
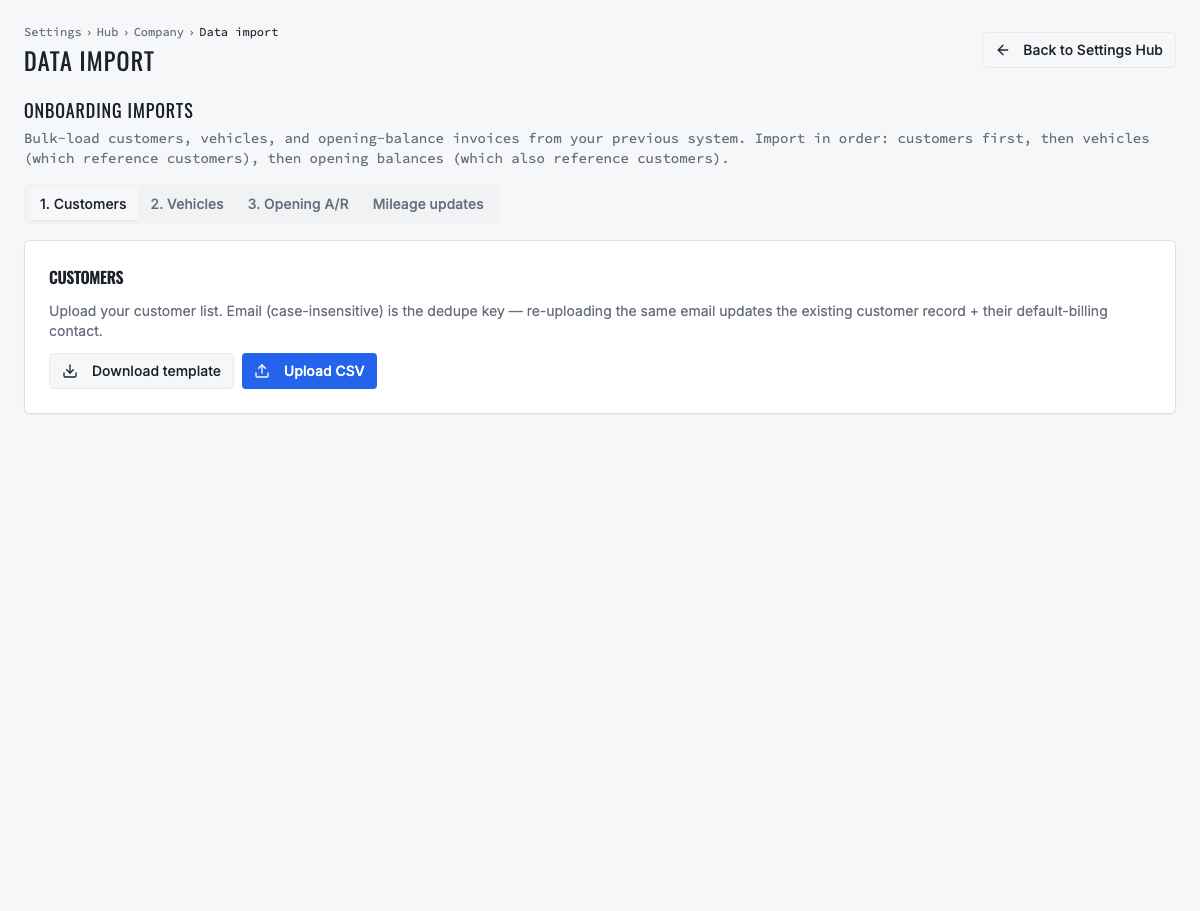
For daily intake, the advisor searches before creating a customer. If no reliable match exists, create one household or business record with the correct contacts and billing information. For an existing customer database, use the native bulk import: Settings → Company → Data Import → Customers. Download the current CSV template, prepare the file, map the source columns, import it and review every added, updated and rejected row.
- Customer import requires company_name (the legacy name header is also accepted). Map contact_first_name, contact_last_name, email, phone or mobile, address fields, tax/account fields, billing mode, billing frequency and notes when available.
- Email is the case-insensitive matching key for an existing customer. Clean and verify it before import; missing or shared email values require deliberate reconciliation.
- Use the mapper to connect each source heading to the corresponding VMOTEK field. Do not rename data merely to force an uncertain match.
- Run a representative pilot first. The result reports inserted, updated and failed rows with row-level reasons; correct the staging file and rerun only after duplicate behavior is understood.
- After import, search sample customers and verify organization name, contacts, address and billing settings. Resolve duplicates before live work begins.
- Record SMS consent before sending text messages.
- For a business, keep the organization separate from individual operational and billing contacts.
02
Identify or create the vehicle
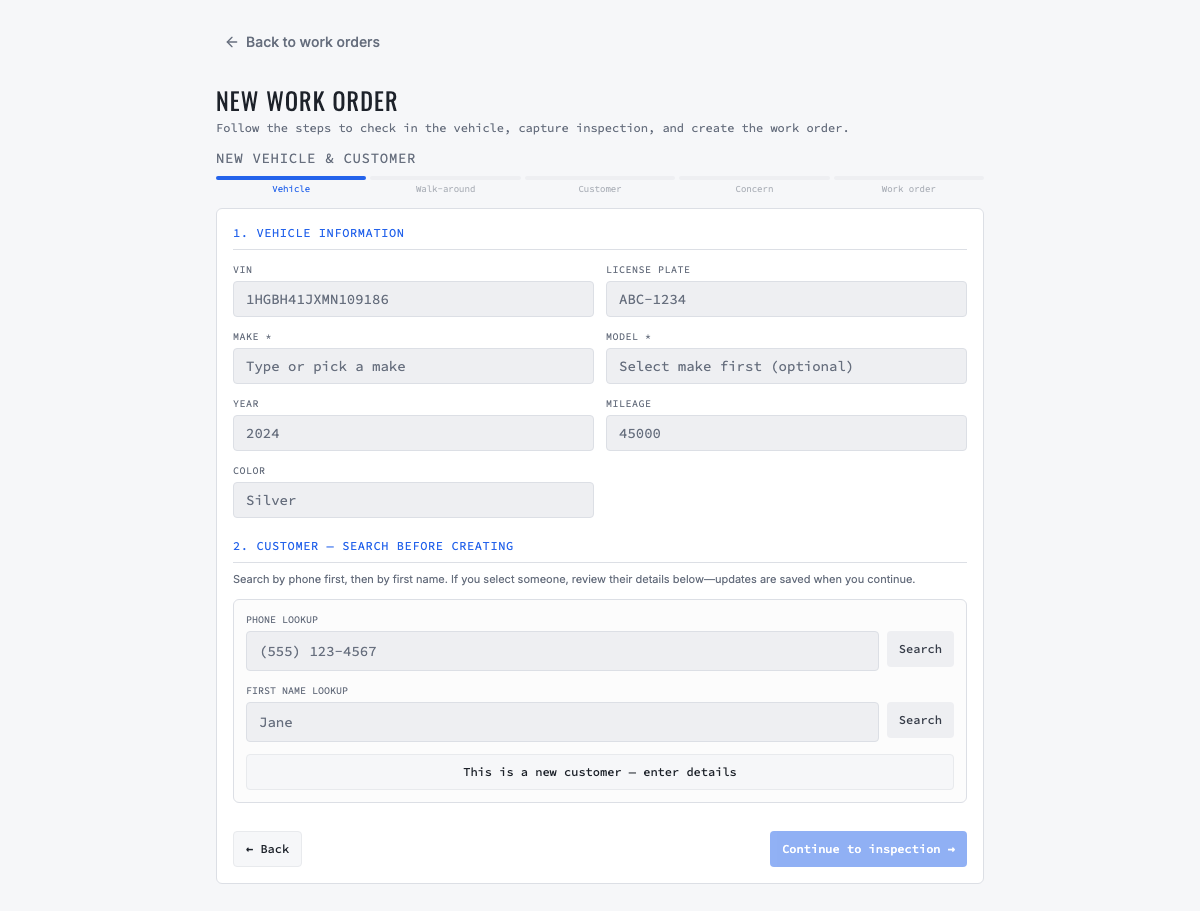
For daily intake, search by VIN or license plate and confirm the vehicle belongs to the correct customer. For an existing vehicle database, open Settings → Company → Data Import → Vehicles. A valid 17-character VIN is sufficient: VMOTEK decodes available year, make, model and type. Import customers first when the file can map ownership; VIN-only rows are held under Unassigned Vehicle Imports until staff assigns the correct customer.
- Every vehicle row requires serial_no, used as the VIN or durable serial identifier.
- Optionally link the vehicle with customer_email or customer_accno. If neither resolves, assign it from Unassigned Vehicle Imports after upload.
- Map description, manufacturer, model, assetnumber or fleet unit, asset type/status and acquisition or warranty dates when the source contains them.
- Normalize obvious VIN spacing, but never guess unknown characters. Do not treat license plate alone as a durable duplicate key.
- After import, sample consumer and fleet vehicles. Verify the owner, VIN, unit number, make/model and service-history relationship.
03
Create vendors and use vendor catalogs
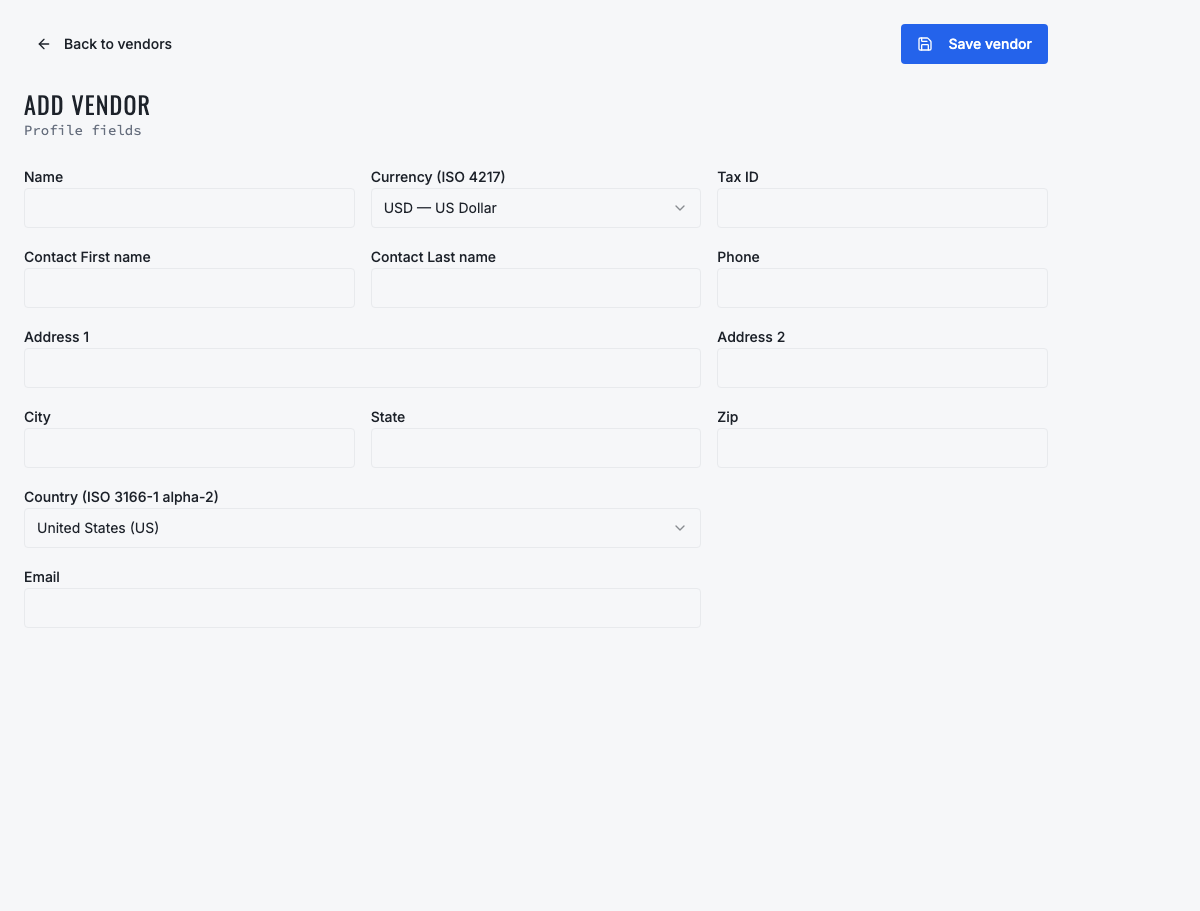
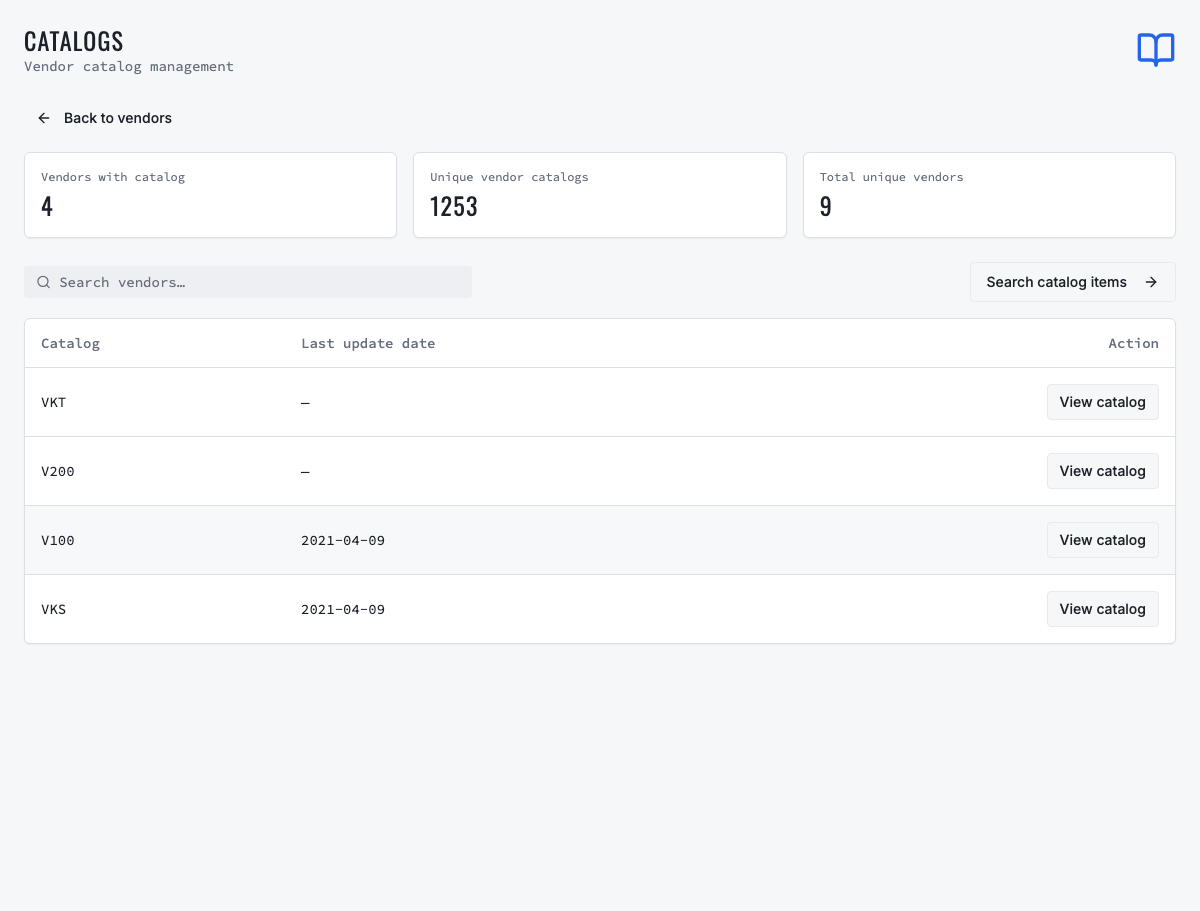
Create a vendor before issuing its first purchase order. Select Procurement → Vendors → Add Vendor, enter the required vendor name and the available contact, address, currency, tax and account information, then save and reopen the record. Use Catalog on the vendor list to view and search catalog items supplied for that vendor.
- Search before creating a vendor so spelling variations do not split purchasing history.
- Verify ordering email, phone, payment terms, currency and ship-from information before live purchasing.
- Current production-safe workflow: create vendors manually and use the catalog pages to view/search vendor catalog data already onboarded.
- Important limitation: the current Upload vendors control is not a persistent native-API import, and the repair UI does not yet provide a persistent vendor-catalog CSV upload. Do not rely on either for production migration.
- For bulk vendor or catalog onboarding, prepare a controlled source file and coordinate the supported import/integration path with VMOTEK Support until native persistent import is released.
Set up and operate
Customers & Fleets
Configure durable customer relationships, fleet access, preventive-maintenance operations and billing behavior.
01
Preserve declined work and service history
Keep declined recommendations, inspection evidence, estimates, approvals, work orders, invoices and payments connected to the durable vehicle record. Schedule appropriate follow-up rather than rebuilding the recommendation from memory. For preventive maintenance, record the actual completion date, odometer or engine hours so the completed cycle enters service history and the next due point rolls forward from verified evidence.
02
Operate fleet customers
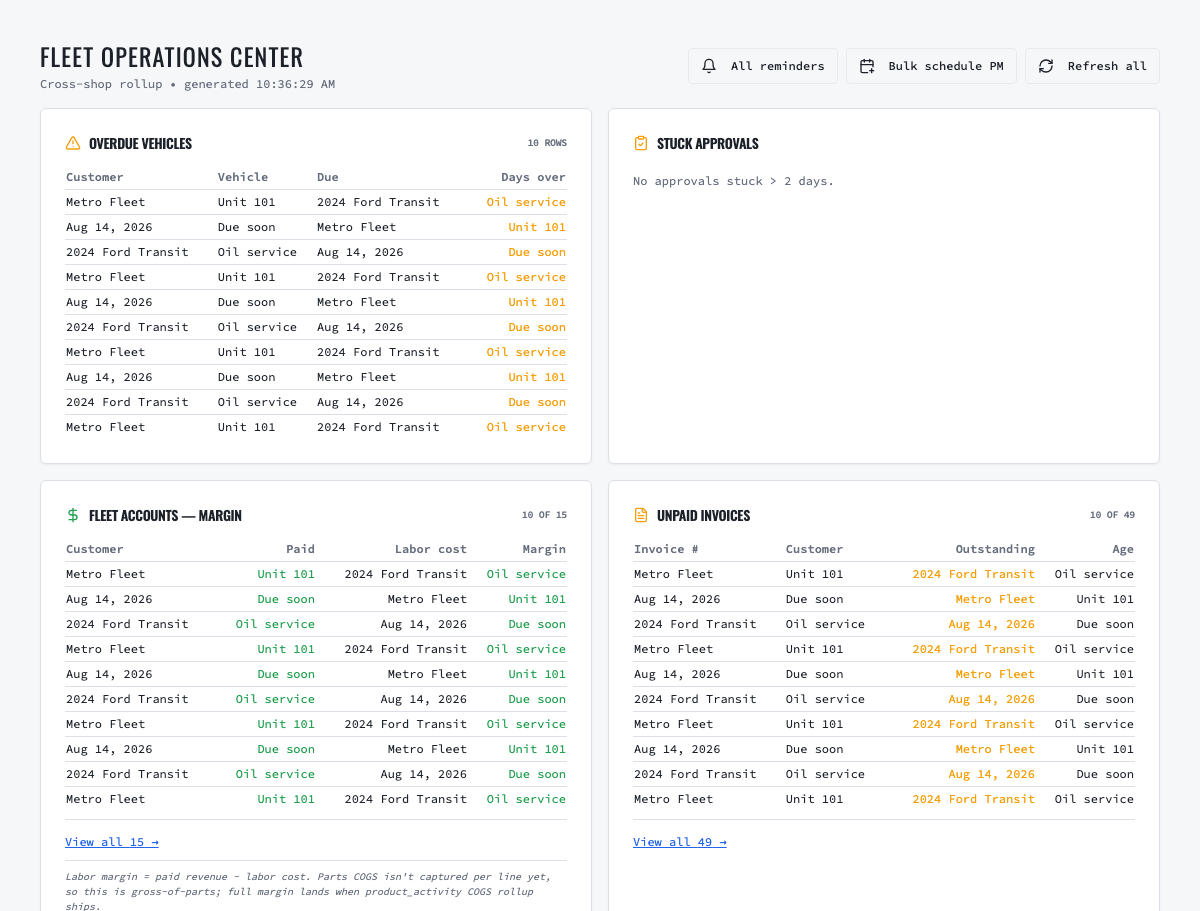
Create one business or fleet customer using the organization name, then add the human operational, approval and billing contacts separately. Register each active unit under that organization with VIN, fleet unit, plate, current odometer and engine hours when applicable. Configure date, mileage, engine-hour or combined maintenance rules from trusted last-service evidence. Work the Due, Due soon and Overdue queues, create reviewable draft work orders with duplicate protection, schedule accepted units and complete maintenance through the same shop workflow used for retail repairs.
03
Generate regular or consolidated fleet billing
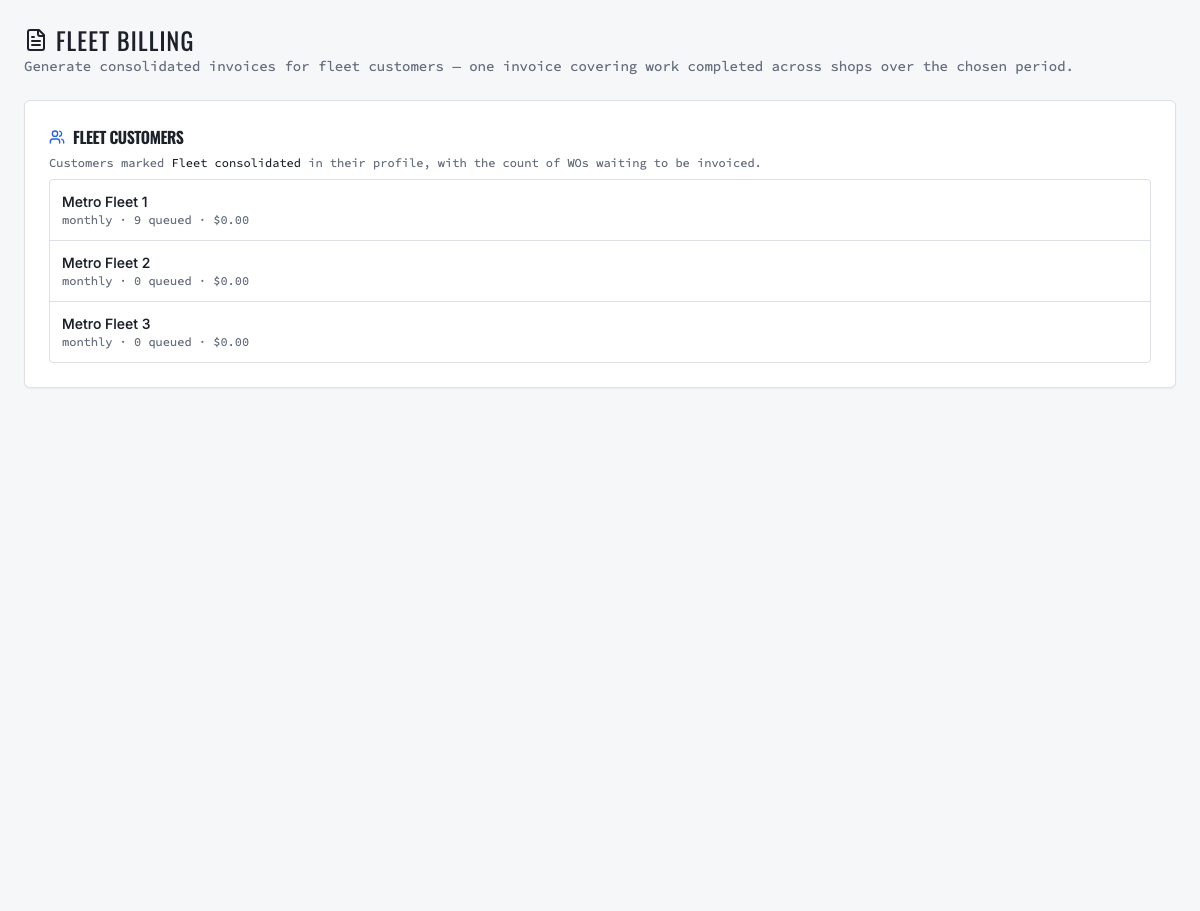
Define who may request service, approve repair scope and receive invoices; these may be different fleet contacts. Preserve the estimate decision, approver identity, required customer PO number and revised authorization when scope changes. Use regular billing when each repair is invoiced separately. For fleet consolidated billing, complete eligible authorized work throughout the billing period, open Fleet Billing, select the customer and reconcile every vehicle, work order, shop, date and amount before generating the combined invoice. Portal access and billing mode are separate decisions.
Set up VMOTEK
Integrations
Connect and validate communications, payments, accounting and vehicle-data services.
01
Connect and monitor integrations
Connect Stripe, Twilio, Gmail, QuickBooks Online and supported Geotab telematics configurations only through accountable administrators. Validate one real workflow in test mode and again after production cutover. For telematics, verify device-to-vehicle identity, odometer or engine-hour value, source timestamp and the resulting maintenance due state. A Connected badge is not enough; confirm the result and errors in VMOTEK and the provider. VMOTEK's telematics integration supports maintenance data, not live GPS dispatch or route optimization.
Operate VMOTEK
Daily Operations
Follow the complete customer and vehicle lifecycle from scheduling and intake through repair, purchasing, payment and delivery.
01
Schedule an appointment when work is planned
Create an appointment with customer, vehicle, shop, requested service, date, time and expected duration. Add technician or bay only when known. Confirm the customer's contact channel and use appointment status to distinguish scheduled, arrived, completed, cancelled and no-show activity.
- Do not create a work order merely to reserve a future time slot.
- Record the customer's stated concern without prematurely diagnosing it.
- At arrival, continue into intake so the appointment and repair history stay connected.
02
Check in the vehicle and document intake condition
At arrival, verify mileage, fuel or charge level, warning indicators and customer concern. Complete the walk-around and record meaningful pre-existing damage or condition evidence. Confirm authorization for road testing or diagnostic work according to shop policy.
03
Record the complaint and perform inspection or diagnosis
Write the concern in the customer's language, then add technician findings separately. Use inspection states consistently and record measurements, photos and notes where they support a decision. Diagnosis remains the responsibility of qualified shop personnel; software does not replace professional judgment.
- Condition: what was observed or measured.
- Consequence: why it matters.
- Recommendation: what service or further diagnosis is proposed.
- Priority: service now, schedule soon or monitor.
04
Create the estimate
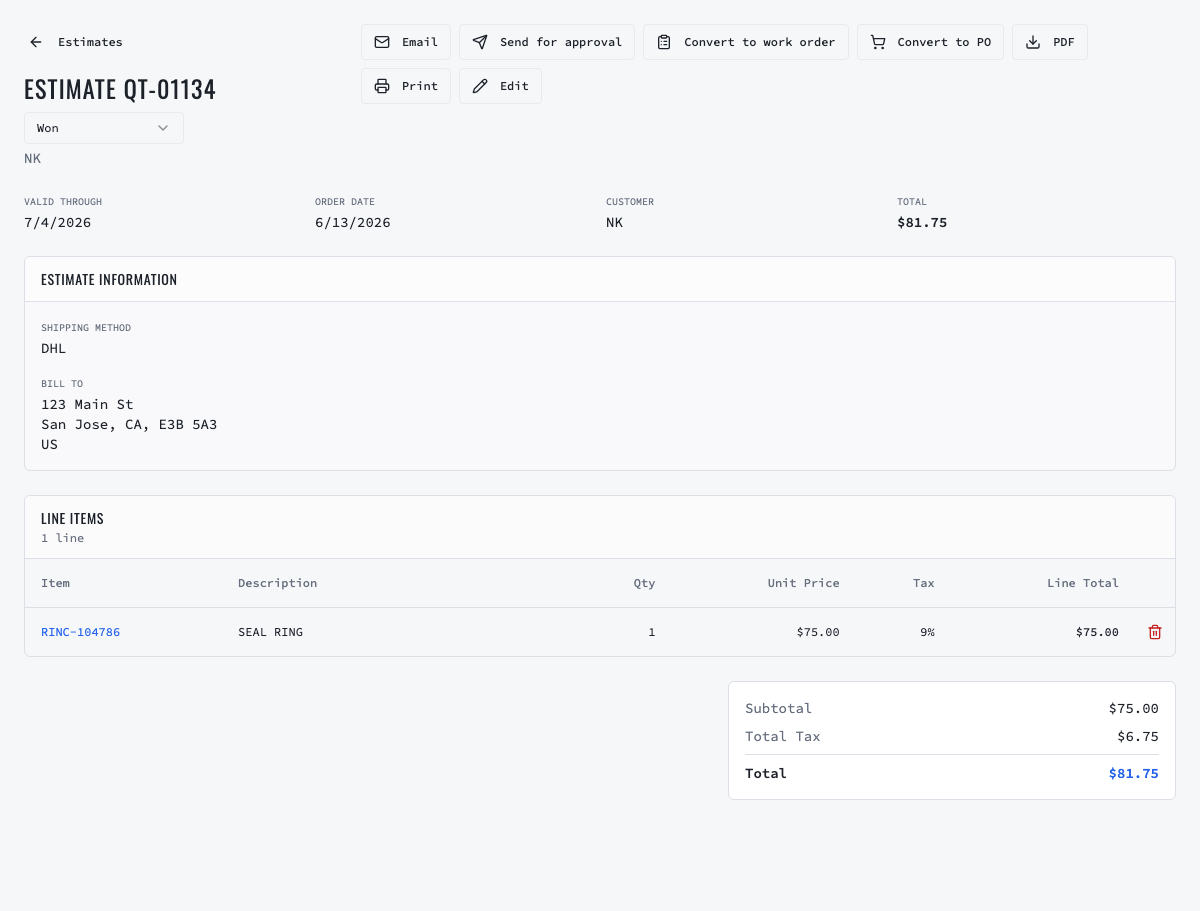
The advisor adds customer-readable labor, parts, quantities, rates, fees, discounts and taxes. Verify the customer, vehicle, shop, fleet unit, PO requirement and complete total. Separate urgent work from future recommendations and remove internal abbreviations the customer will not understand.
05
Send the estimate for approval
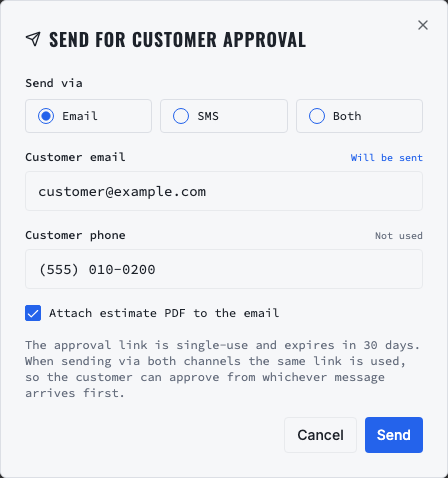
Select Send for approval, choose Email, SMS or Both, verify the recipient and attach the PDF when appropriate. SMS requires valid consent. The same single-use link is sent through both channels when Both is selected and expires after 30 days.
06
Process approval, requested changes or decline
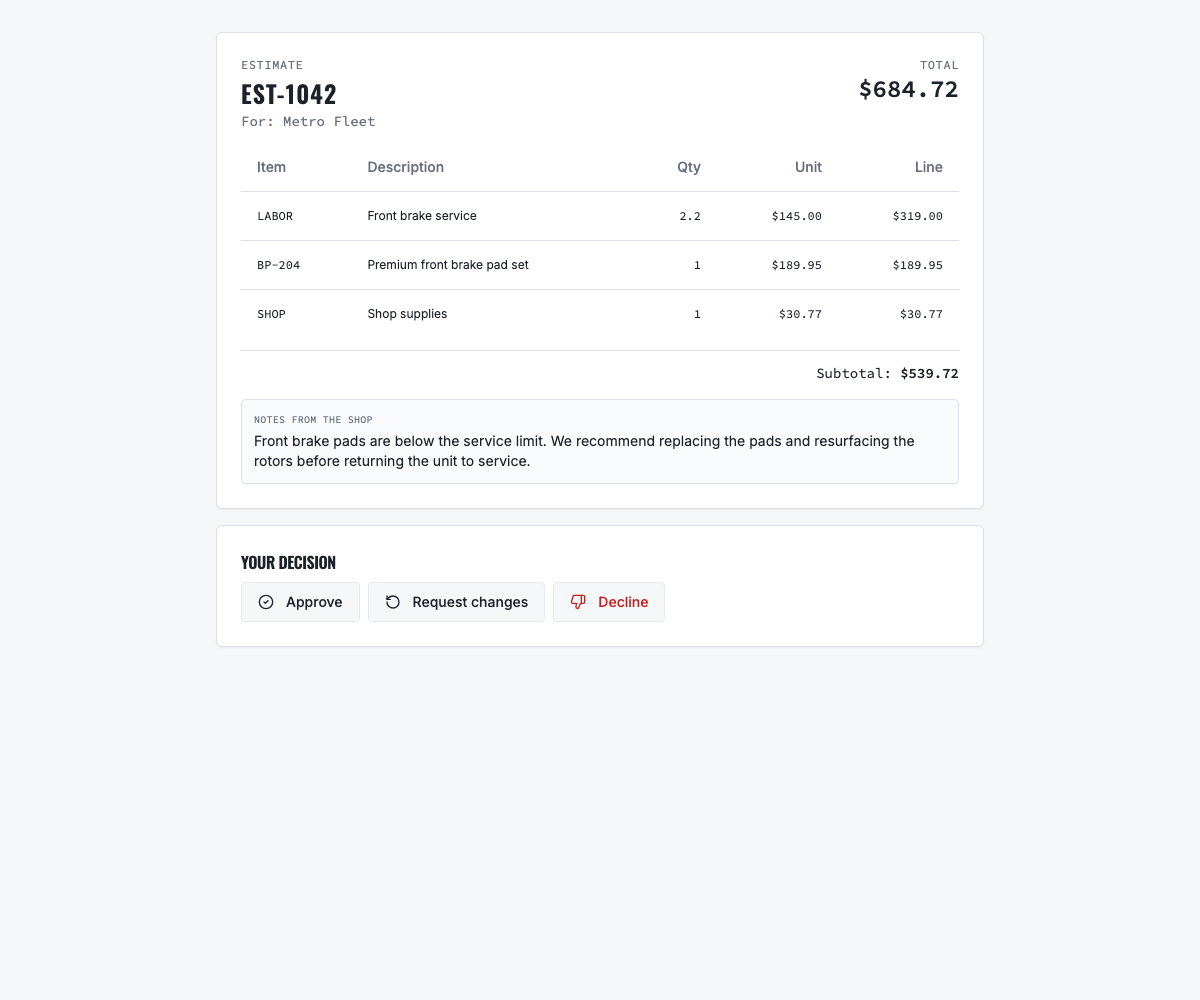
The customer sees the itemized estimate and can Approve, Request changes or Decline. Approval applies to the complete estimate. If only part of the work is wanted, the customer requests changes; the advisor revises the scope and price and sends a new link. Never infer authorization from message delivery or link opening.
07
Prepare the work order
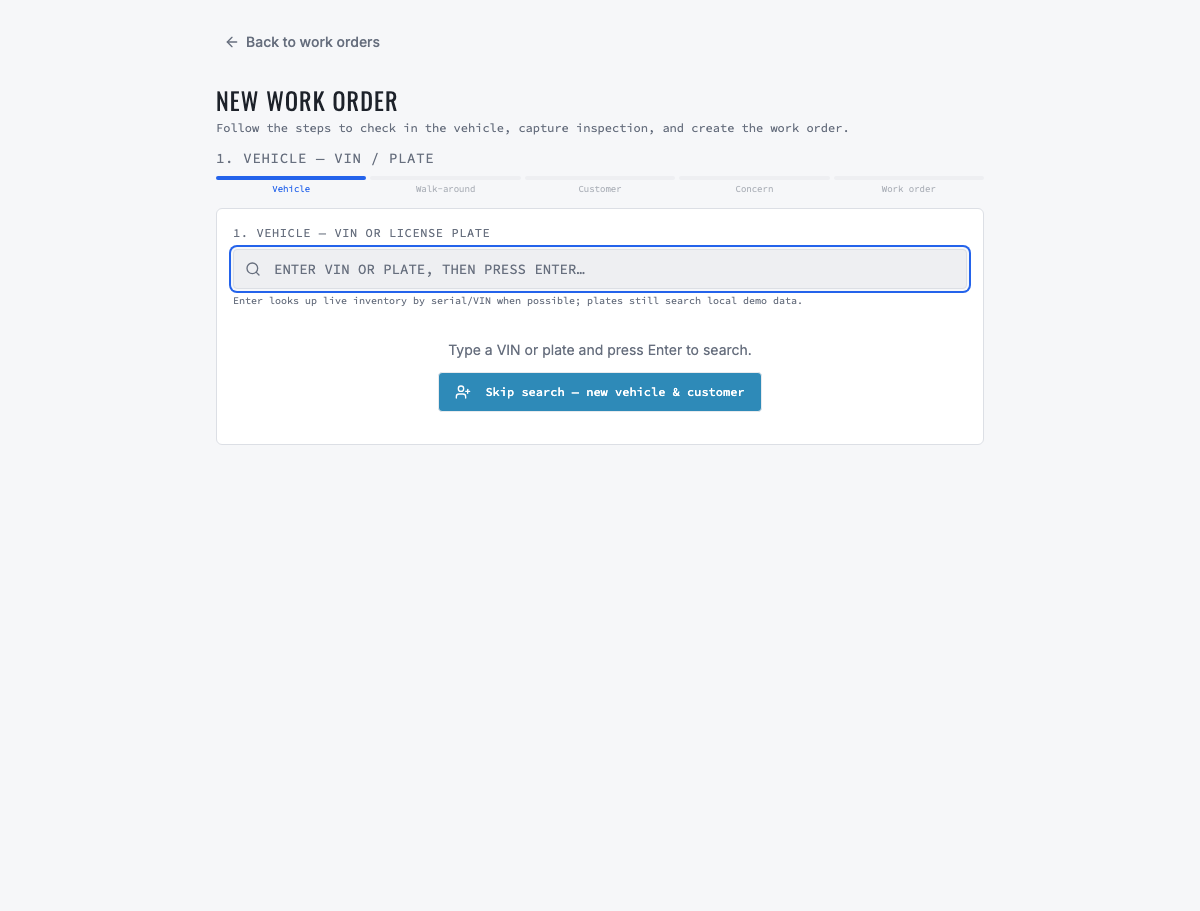
Create or update the work order with the approved labor and parts. Confirm the serving shop, concern, instructions, approval, intake requirements and parts readiness. For repeatable maintenance, select Add service package, preview the published definition against the work-order vehicle, confirm any missing measured quantity, review overage and availability, then apply it. Mark the work Ready only when the configured conditions are satisfied.
08
Assign or claim the work
In advisor-assignment mode, an authorized advisor assigns an eligible technician. In claim mode, an eligible technician claims Ready and unassigned work. In hybrid mode, both paths are available according to configuration. The technician must belong to the work order's shop unless company policy and access are deliberately changed.
- Open and No technician identifies undispatched work.
- Assigned and Not started identifies work waiting for the named technician.
- Ready describes preparedness; it does not necessarily mean unassigned.
- A 403 on assignment usually requires checking role, work-order shop and technician shop membership.
09
Start repair and record labor
The eligible technician moves the work to In Repair, records work performed and technician time according to shop policy and updates progress or blocked reasons. Advisors use status and assignment rather than side conversations to understand current work.
10
Find and allocate parts
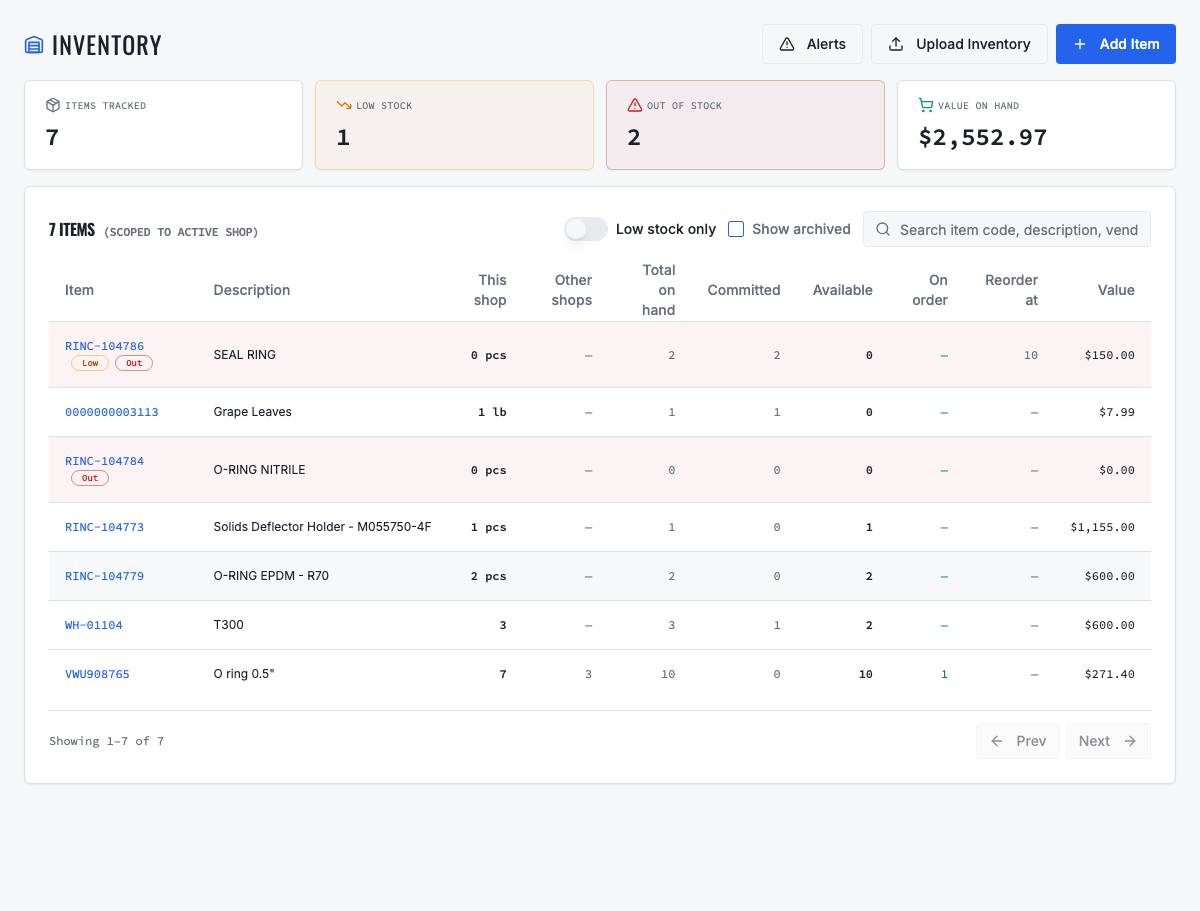
Search inventory from the work order. Compare on-hand, committed and available quantity before allocating a part. In a multi-shop company, check local and other-shop stock. Keep the shared catalog item connected to the work-order line so quantity and history remain traceable.
11
Transfer stock from another shop
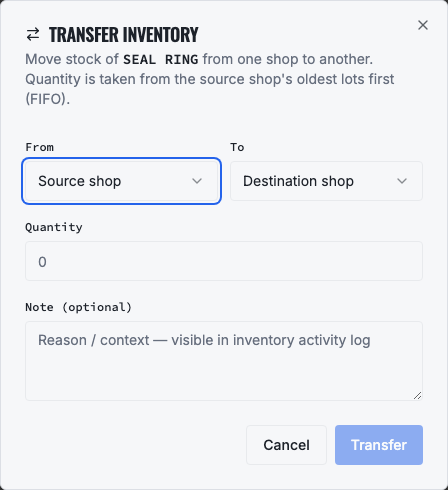
When another shop has transferable quantity, open the item and select Transfer. Choose Quick transfer for an immediate authorized handoff, or Controlled transfer for request, approval, dispatch/in-transit and destination receipt. VMOTEK preserves FIFO or selected-lot cost. A transfer does not create purchase spend or revenue; parts COGS is recognized later at the shop that consumes the part.
12
Purchase unavailable parts
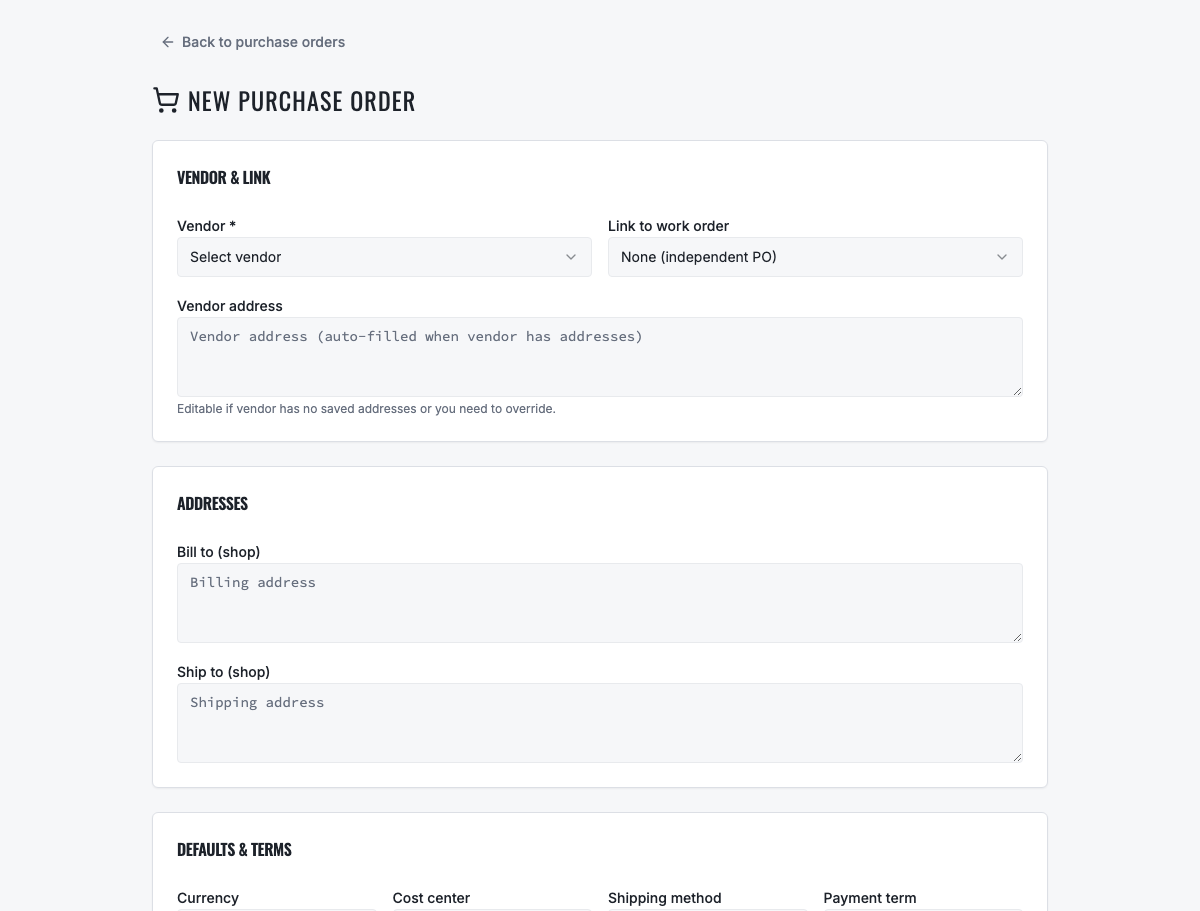
A single shop normally creates a purchase order directly: choose vendor and destination, add items, quantities and costs, submit for approval when configured, send it to the vendor and receive actual quantities into the correct shop. Partial shipments remain partially received.
13
Use purchase requests and consolidated procurement
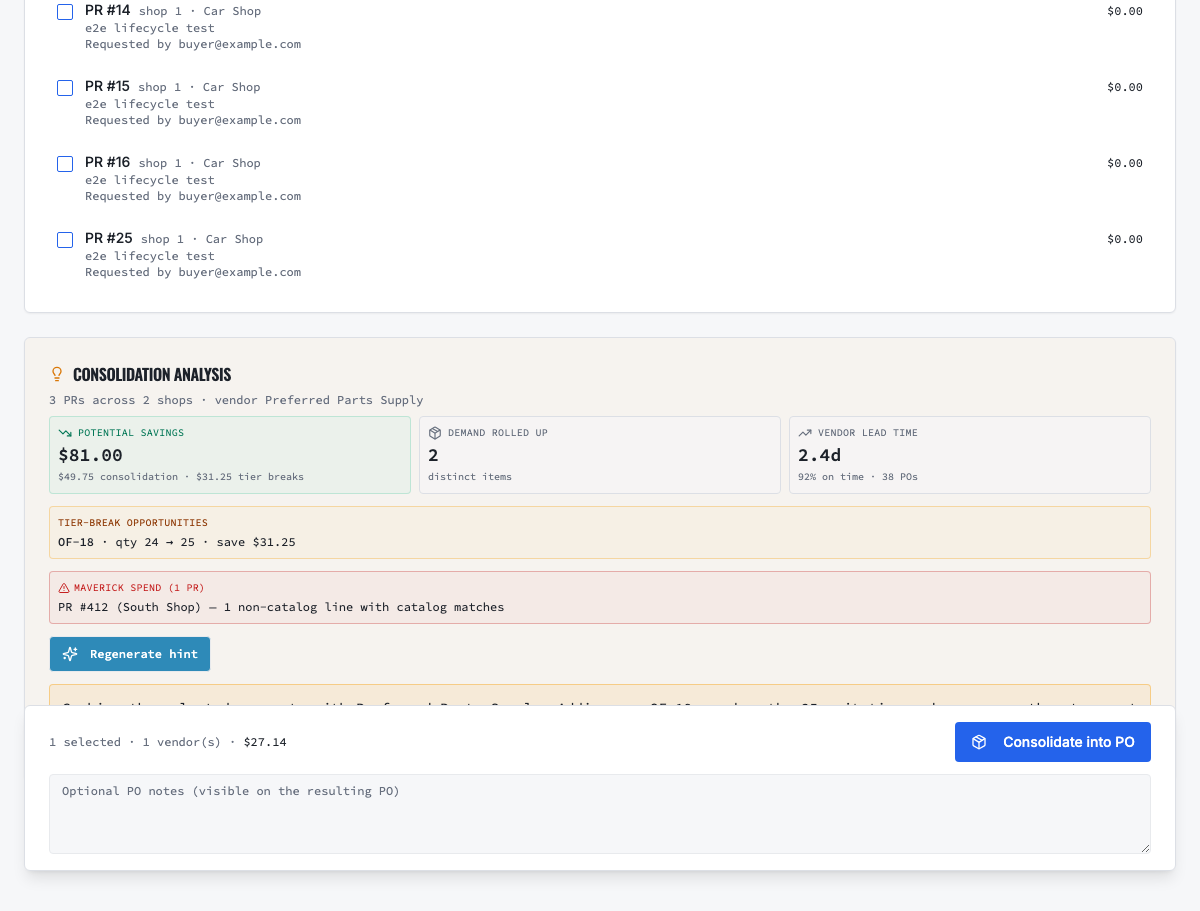
In Connected Operations, a shop can submit an internal purchase request. An approver validates the need. Central procurement selects approved requests sharing a vendor, reviews demand, historical price, tier breaks, catalog exceptions, vendor lead time and AI-assisted buyer guidance, then creates one consolidated PO while preserving source shop and cost center.
14
Handle additional work discovered during repair
The technician documents the new finding and evidence. The advisor adds the additional scope and price to a revised estimate and obtains a new decision. Do not perform chargeable work outside the approved scope merely because the vehicle is already disassembled or in the bay.
15
Complete repair and quality control
The technician completes authorized lines, records final notes and measurements and marks the repair Completed or ready for the shop's configured quality-control step. The responsible reviewer confirms the repair, parts and labor, warning indicators, cleanliness and final road test or reason it was not performed.
- Completed means repair execution is done.
- It does not mean the invoice is paid or the vehicle has been returned.
- If Completed is clicked as a status filter, a second click should not silently remove the same completed records.
16
Create and email the invoice
The advisor or billing user creates the invoice from completed authorized work. Review labor, parts, fees, taxes, discounts, customer information and total. Open the invoice and email it to the verified customer or billing contacts. Add CC recipients when needed and allowed.
17
Record payment and deliver the vehicle
Collect payment through the configured method and reconcile the status. If Stripe is used, confirm the payment in both VMOTEK and Stripe. Mark Delivered only when the vehicle is handed back to the customer or fleet representative. Retain the invoice, payment and delivery status as separate facts.
Operate VMOTEK
Management
Use exception queues, operating reviews and control checklists to keep every shop accountable.
01
Use the Reports landing page as a management command center
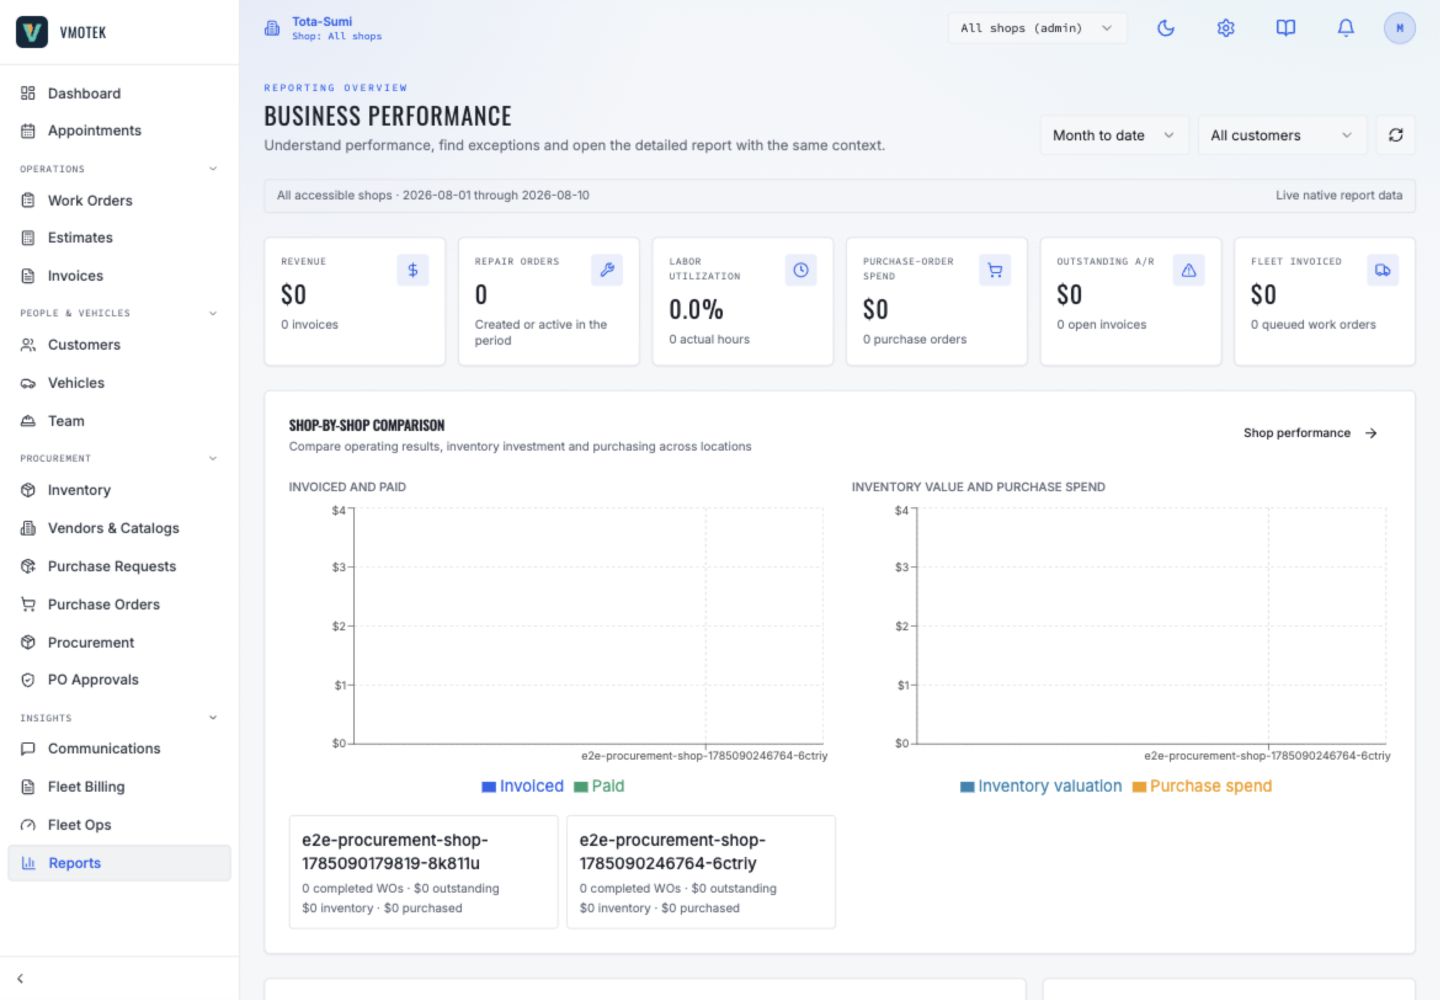
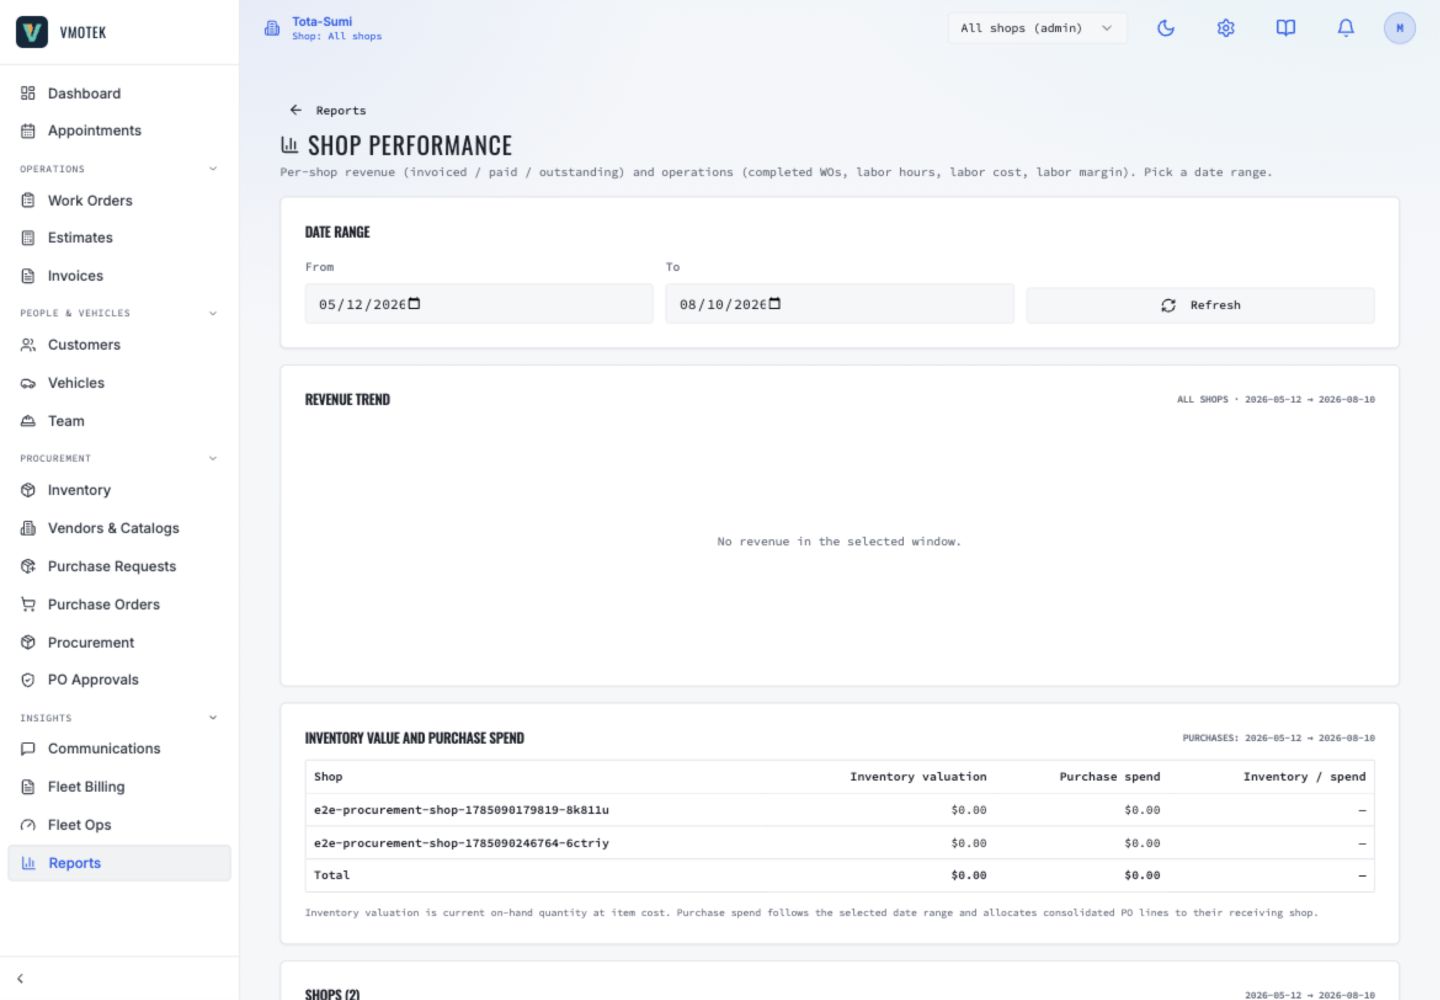
Under Insights, select Reports. Start by confirming the active shop in the application header, reporting period and customer type. The landing page summarizes revenue, repair orders, labor utilization, purchase-order spend, outstanding receivables and fleet invoicing. Use the revenue trend, work-order mix, Needs attention, purchasing and inventory, and fleet billing panels to identify the next management action. Select a KPI, chart link or Detailed report to open the underlying report with the applicable date, shop and customer context carried forward.
- Choose Month to date, Last 30 days, Last 90 days or Year to date before interpreting a comparison.
- Use All customers, Retail customers or Fleet customers to keep the population explicit.
- The active shop in the application header controls single-shop report scope; authorized multi-shop administrators can select the all-shops context.
- Treat Out-of-stock items, Below reorder point, Queued fleet work orders and Outstanding invoices as action queues, not decorative counters.
- Use Detailed reports for tables, charts, exports and subscriptions after the overview identifies the question.
- Reconcile surprising totals to invoices, work orders, purchase orders, receipts, stock movements or customer records before making a decision.
02
Daily operating checklist
Advisors review today's appointments, arrived vehicles, unassigned Ready work, pending approvals, blocked repairs, completed work awaiting invoicing and vehicles ready for delivery. Technicians review assigned or claimable work and blocked reasons. Purchasing reviews urgent shortages, approved requests, open POs and expected receipts. Billing reviews unpaid or failed transactions. Managers open Reports and use Needs attention to assign owners for out-of-stock items, reorder exceptions, queued fleet work and outstanding invoices before those conditions age silently.
03
Weekly management checklist
Set the reporting period to Last 30 days or another agreed window. Review revenue trend, work-order mix, labor utilization, work-order aging, declined-work follow-up, inventory shortages and adjustments, open and partial POs, procurement opportunities, fleet PM due queues, unpaid invoices and communication failures. For a multi-shop company, use the all-shops Shop-by-shop comparison to compare invoiced and paid amounts, completed work, outstanding balances, inventory valuation and purchase spend. Open Shop performance for the per-location revenue trend and detailed tables. Assign every exception an owner and next review date.
04
Monthly control checklist
Use Month to date and Year to date views to reconcile revenue, payments, outstanding receivables and accounting synchronization. Review consolidated fleet billing, inventory valuation, cycle counts, purchase spend, vendor price and delivery performance, and estimated versus realized procurement savings. In a multi-shop operation, investigate material differences between inventory investment, purchase spend, invoiced revenue, labor performance and outstanding balances rather than ranking locations from one metric. Also review subscription and integration charges, administrators and cross-shop access, portal memberships, scheduled report delivery and backup or export obligations.
05
Troubleshoot without bypassing controls
A 403 usually requires checking user role, module permission, active shop and explicit shop membership. An empty or unchanged report may reflect the application-header shop selection, date range, customer type, status filter or genuinely absent source transactions. Confirm the report scope label, refresh once and open the supporting table before reporting a data defect. A queued SMS requires provider delivery evidence, and OAuth failures require exact origins, redirects and granted scopes. Do not change database permissions, tenant data, report filters or business states merely to make a number appear.
06
Completion standard
A shop is operating successfully when staff can take a customer from appointment or walk-in through intake, evidence, estimate, approval, authorized work, parts, purchasing, technician execution, invoice, payment and delivery without losing the relationships between records or relying on an undocumented spreadsheet. Managers can identify exceptions, and every sensitive action has an accountable user and shop.
Related product areas
Understand the capability behind the task
Continue to the applicable platform page for workflow behavior, role differences and connected operating consequences.
Ready to move forward?
Need help with your configuration?
Existing customers should use in-product support for account-aware assistance. Evaluation teams can contact us to discuss requirements.